If your team works across multiple offices, countries, or time zones, a few preparation steps can help you establish consistent workflows from day one.
This checklist guides you through the key setup decisions before creating your first shared Archicad Teamwork project.
1. Define roles and responsibilities
2. Prepare templates, libraries and standards
3. Configure permissions on BIMcloud SaaS
4. Teamwork - Create and test the project
5. Plan project delivery early
6. Complete basic project setup
Define roles and responsibilities
Why is this important?
Clear ownership helps teams make decisions faster, maintain standards consistently, and avoid confusion when multiple offices are involved.
Assign a Project Lead
The Project Lead is responsible for project decisions, client communication, deadlines, and overall project direction.
Why it matters: A clearly identified project lead helps teams stay aligned across different offices and time zones.
Assign a BIM Coordinator
The BIM Coordinator manages Teamwork workflows, BIMcloud SaaS administration, project standards, and coordination procedures.
Why it matters: A dedicated BIM Coordinator helps ensure that collaboration workflows are implemented consistently.
Define reviewers and approvers
Identify who reviews models, documentation, and deliverables before information is shared externally.
Why it matters: Defined review responsibilities help maintain quality and reduce approval bottlenecks.
Assign ownership of templates, libraries and standards
Appoint someone to maintain project resources and documentation.
Why it matters: Teams work more consistently when everyone uses the same standards and library content.
Nominate a contact person for each office in case of multiple locations
Assign one primary contact per location.
Why it matters: Communication becomes simpler and local issues can be resolved faster.
Prepare templates, libraries and standards
Before creating your Teamwork project, establish the standards, templates, and resources your team will use throughout the project.
Why is this important?
Without shared standards, every team member may use different naming conventions, libraries, modeling practices, or documentation methods. Establishing these foundations before modeling begins helps maintain consistency, reduces rework, and allows new team members to onboard faster.
Select or create a shared project template
A project template provides a consistent starting point for every team member. Templates can include project settings, views, layouts, attributes, favorites, classifications, and documentation standards.
Why it matters
Using a shared template helps ensure that all offices start from the same baseline and reduces the amount of project setup work required for each new project.
Example
A global firm may maintain one company template that already includes standard view maps, sheet layouts, title blocks, classifications, and graphic overrides.
Define naming conventions
Agree on naming rules for project files, views, layouts, BIMcloud projects, published documents, and deliverables.
Why it matters
Consistent naming makes projects easier to navigate and helps team members locate information quickly. It also reduces confusion when multiple offices contribute to the same project.
Example
Define modeling and documentation standards
Establish how the team should create, organize, and document model information.
Standards may include:
- Layer structures and Layer Combinations
- Classification systems
- View setup standards
- Layout standards
- Documentation requirements
- Modeling conventions
Why it matters
When everyone follows the same standards, project information becomes easier to review, coordinate, exchange, and maintain throughout the project lifecycle.
Create or update the BIM Manual
A BIM Manual documents how the team will work together during the project.
It may include:
- Roles and responsibilities
- Naming conventions
- Modeling standards
- File exchange procedures
- Review and approval workflows
- Project deliverable requirements
Why it matters
The BIM Manual serves as a single source of truth for the project and helps ensure every office follows the same processes and expectations.
Beginner Tip: Treat your BIM Manual as a living document. Review and update it whenever project requirements or workflows change.
Upload and verify project Libraries
Confirm that all required Libraries are available and accessible to every project participant before work begins.
Why it matters
Missing or inconsistent library content can lead to missing objects, incorrect documentation, and coordination issues between offices.
Example
If one office uses a newer library version than another, objects may display incorrectly or become unavailable when files are exchanged.
Store project resources in a shared location
Store templates, standards, BIM Manuals, libraries, and other project resources in a location that all project participants can access.
Why it matters
When everyone references the same resources, there is less risk of outdated files being used and less time spent searching for information.
Recommended resources to store centrally
- Project template
- BIM Manual / BIM Execution Plan
- Project libraries
- Project standards
- Naming convention guidelines
- Project delivery requirements

Configure permissions on BIMcloud SaaS
With your team structure and standards in place, the next step is to configure BIMcloud SaaS access and permissions.
Why is this important?
Not every user needs the same level of access. Proper permission management helps protect project data, reduces accidental changes, and ensures team members can access only the projects and tools they need.
Assign permissions based on responsibilities
Different users require different access levels depending on their responsibilities.
Typical examples
- BIM Coordinator – Create projects, manage users, configure Teamwork settings.
- Project team members – Access and edit project content.
- Project reviewers – Review models and documentation.
- External consultants – Access only specific project folders or projects.
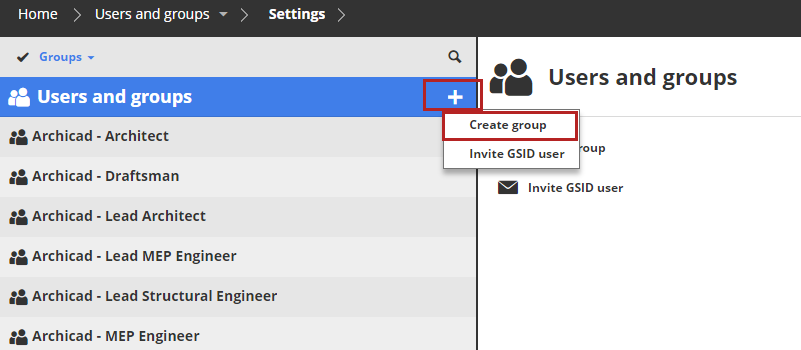
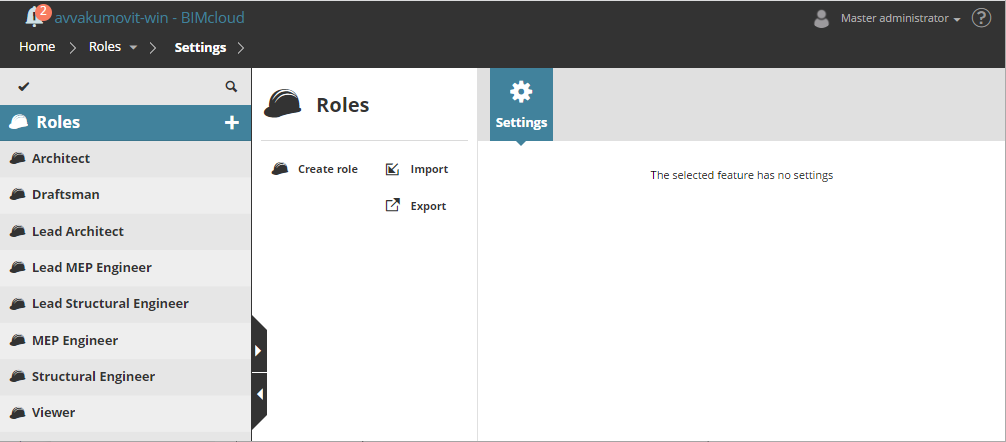
Roles are a set of permissions that describe what the owner of the role can do with specific element types or data types, both on the BIMcloud Manager or in Archicad Teamwork projects.
The administrator can use roles to limit the functions available for a specific user to prevent accidental damage or unwanted modifications to the project. Each user can have different roles for different projects.
For most BIMcloud SaaS setups, it is recommended to assign users to the appropriate predefined user group(s). Each default group has predefined roles, so once a user is added to a relevant group, they can begin working with the correct permissions.
Why it matters
By assigning permissions according to project responsibilities, team members can work efficiently without unnecessary access to sensitive settings or unrelated projects.
Review administrator access
Avoid assigning administrator rights to every user.
Why it matters
Restricting administrative privileges helps reduce accidental changes to BIMcloud settings, user accounts, and project configurations.
Beginner Tip: Start with the minimum permissions required and grant additional access only when needed.
Configure access for external consultants
Consultants often require access to project information, but not necessarily to every project, folder, or administrative function.
Why it matters
Limiting access helps protect project information while still supporting efficient collaboration.
Example
An MEP consultant may require access only to a specific Teamwork project and its coordination resources, rather than to the firm's entire BIMcloud environment.
Verify user access before project kickoff
Before production work begins, ask users to log in and confirm they can access the correct projects, folders, and resources.
Why it matters
Resolving access issues before project kickoff helps prevent interruptions during the early project stages.
Teamwork - Create and test the project
Once roles, standards, libraries, and permissions are ready, you can create the shared Teamwork project where collaboration will take place.
Why is this important?
A Teamwork project allows multiple users to work on the same Archicad project simultaneously through BIMcloud SaaS. Setting it up correctly ensures everyone can collaborate efficiently from the beginning.
Create the Teamwork project
Create the project in Archicad and share it to BIMcloud SaaS.
Why it matters
Instead of exchanging project files manually, all users work in a shared project environment where information remains synchronized.
Add project participants
Invite project members and assign the appropriate Teamwork roles.
Why it matters
Early participant setup allows the team to start collaborating immediately and helps identify any permission issues before production work begins.
Verify Library availability
Confirm that all project libraries are available and loaded correctly for all users.
Why it matters
Missing libraries can result in missing objects, incomplete models, and inconsistent project documentation.
Test Send & Receive
Send & Receive is the primary synchronization method used in Teamwork.
Send uploads your changes to BIMcloud. Receive downloads changes made by other team members.
Why it matters
Regular synchronization helps ensure that all participants work with up-to-date project information and minimizes coordination issues.
Test a simple collaboration workflow
Have multiple users create, modify, and synchronize project elements before production work begins.
Why it matters
This helps verify that permissions, libraries, and Teamwork workflows are functioning correctly.
Example
One user creates a wall, sends changes, and another user receives the update and modifies the element. This simple test confirms that the Teamwork environment is working as expected.
Create a practice project for new users
If some team members are new to Teamwork, create a small practice project before starting production work.
Why it matters
This provides a low-risk environment where users can learn Teamwork workflows, reservation concepts, and Send & Receive without affecting a live project.
Beginner Tip: Even experienced Archicad users often benefit from a short Teamwork practice session before joining a collaborative project.
Plan project delivery early
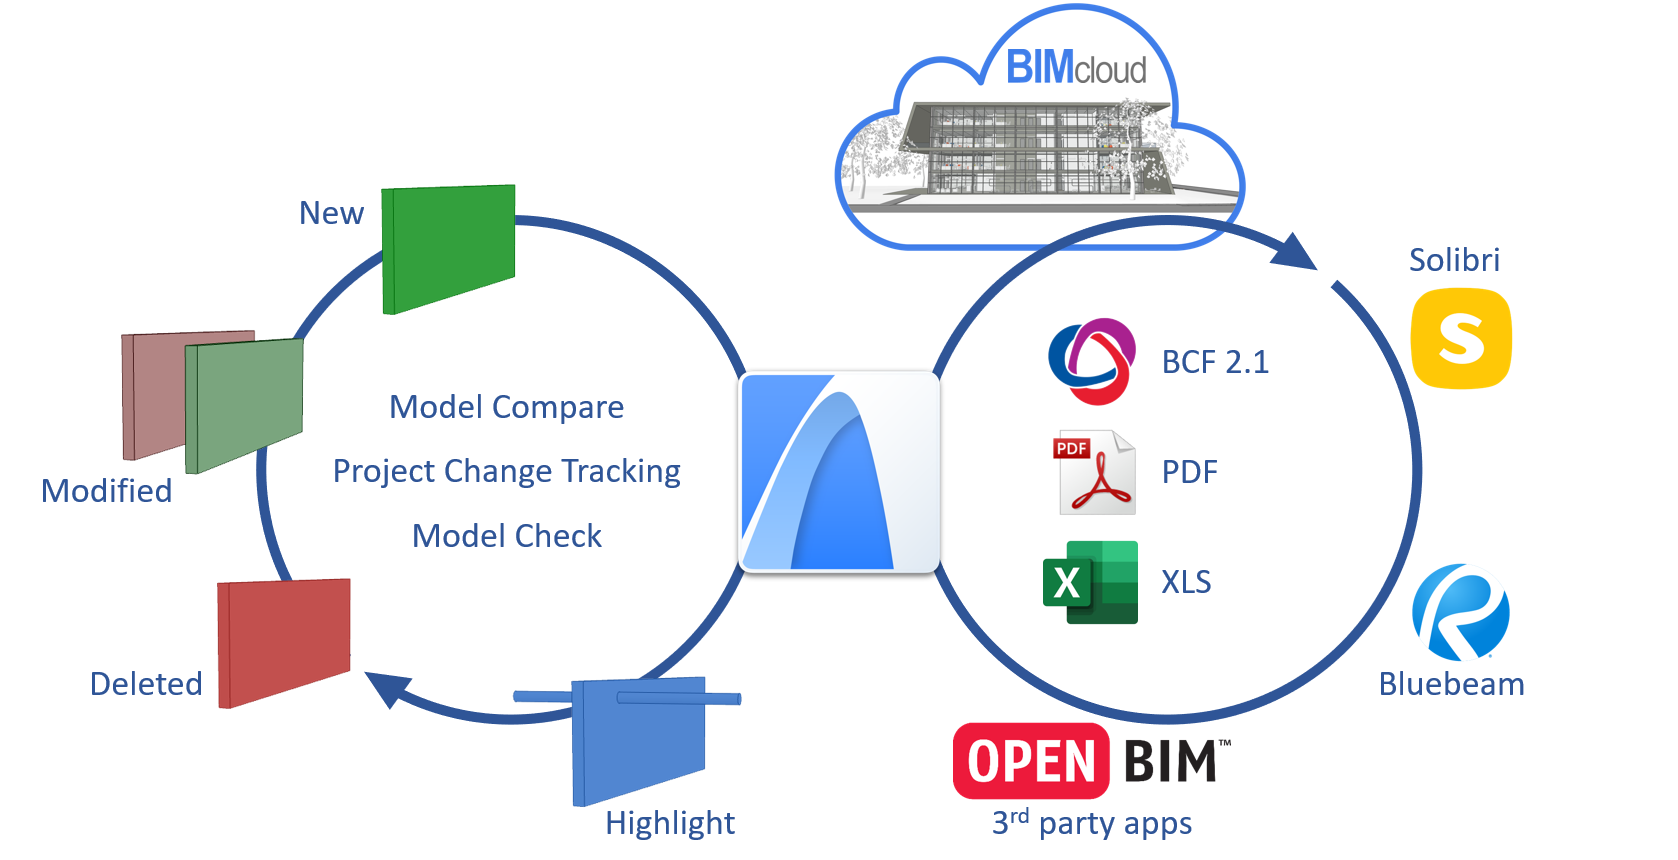
Before detailed modeling begins, take time to understand what information the project needs to produce and how it will be exchanged with clients and consultants.
Why is this important?
Many teams focus on creating the model first and think about deliverables later. However, delivery requirements often influence how the project should be organized from day one. Understanding these requirements early helps avoid rework and supports smoother coordination throughout the project.
Define project deliverables
Identify the information and documentation the project must produce.
Common examples include:
Why it matters
Knowing the final outputs helps the team create the right project structure, views, layouts, and publishing sets from the beginning.
Identify consultant requirements
Determine what information consultants need, how frequently it should be shared, and which file formats are required.
Why it matters
Different disciplines often require different deliverables and levels of detail. Understanding these needs early reduces coordination issues later.
Examples
Establish project milestones and review points
Define when major reviews, coordination meetings, and deliverables will occur.
Why it matters
Regular review points help identify issues early and ensure project quality before information is shared externally.
Examples
- Concept review
- Design development review
- Consultant coordination review
- Construction documentation review
Define information sharing and issue management workflows
Agree how project information, design changes, and issues will be communicated between teams.
Why it matters
Global teams often use multiple communication channels. Having a clear workflow reduces misunderstandings and helps teams keep track of project decisions.
Examples
- Issue Manager for design reviews
- BCF for issue exchange
- Teamwork messaging and notifications
- Coordination meetings and status reviews
Complete basic project setup
Before the team starts detailed modeling, review the core project settings that influence documentation, analysis, and project organization.
Why is this important?
Project settings are easiest to configure correctly at the beginning. Updating them later can affect documentation, schedules, calculations, and coordination workflows.
Set units
Configure working units, dimension units, and calculation units according to your local standards and project requirements.
Why it matters
- Supports consistent measurements.
- Ensures accurate schedules and calculations.
- Helps avoid documentation errors later.
Where to find
Options > Project Preferences
Enter Project Information
Add project-specific information such as:
- Project name
- Description
- Client information
- Architect or engineer information
- Contact details
Why it matters
Project Information can be used as AutoText in layouts and documentation, reducing manual updates and improving consistency.
Where to find
File > Info
Configure location settings
Enter the project's geographic location, latitude, longitude, and project north.
Why it matters
Location settings support:
- Sun studies
- Shadow calculations
- Energy evaluation workflows
- Project visualization
Where to find
Options > Project Preferences > Location Settings
Set up Stories
Define the number of stories and their heights before detailed modeling begins.
Why it matters
Stories provide the vertical organization of the building and affect floor plans, sections, schedules, navigation, and documentation workflows.
Where to find
Design > Story Settings
Prepare for multidisciplinary coordination
If multiple disciplines will contribute to the project, consider coordination requirements before detailed modeling starts.
Why it matters
Early preparation helps avoid workflow issues when exchanging information with structural engineers, MEP designers, and consultants.
Examples
- Coordinate project origins and locations.
- Review IFC exchange requirements.
- Plan collision detection workflows.
- Establish issue management procedures.